An Easy, Repeatable Approach for Lighting Interviews
If you’re someone who shoots a fair amount of interviews or talking heads, I think this approach could be helpful to you. It’s fast, repeatable, and doesn’t require a ton of gear. I’ve even put everything into a free cheat sheet that outlines the key points from this post. You can download it here. You can also watch the video explainer here.
Step 1: Expose for Your Background
Before you even think about your key light, start by dialing in the exposure for your background. Your approach will vary depending on whether you’re going for a high-key or low-key look. When you’re filming on location, you will often have ambient light in your scene that you cannot easily control like windows or overhead fixtures. If not, you will obviously need a light to give your scene a base level of ambient light.
If you're shooting in Sony's S-Log3, set a custom zebra to 32% ±2. Adjust your exposure so that zebras appear across most of your background. This value places your background about two stops below your subject, giving you a 4:1 lighting ratio. You can of course use false color or waveform to expose accurately but not all cameras have those tools so I’m referring to zebras for simplicity and universality.
Step 2: Dial in Your Key Light
Once your background is properly exposed, bring your subject into the frame with your zebras set to 52% ±2 for S-Log3, and adjust your key light until you see zebras on the highlight side of your subject's face - usually on the cheekbone or forehead. For darker skin tones, aim for 40–47%.
With your subject at 52% and your background at 32%, you’ve created a 4:1 lighting ratio. This level of contrast provides cinematic separation without being too dramatic. It’s also flexible: you can make subtle adjustments depending on the mood and setting. My downloadable cheat sheet includes a quick reference for exposing different lighting ratios and skin tones.
Step 3: Refine Your Subject
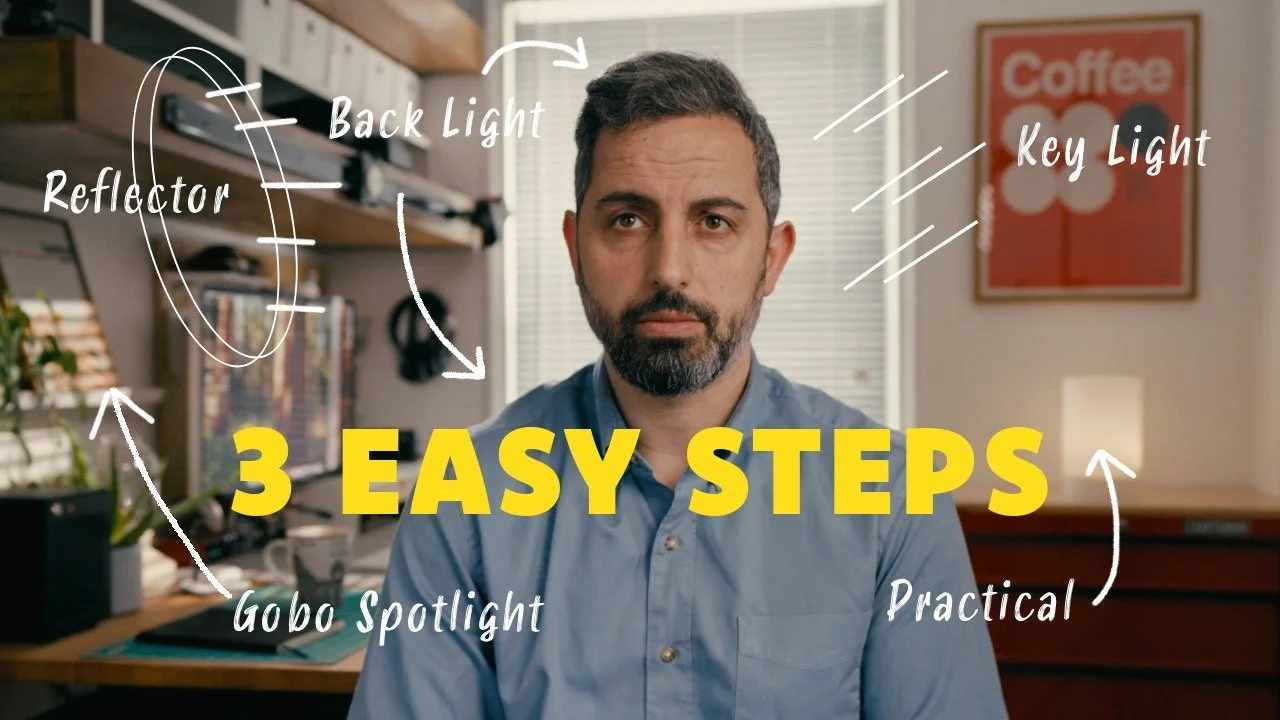
To enhance your subject further, use negative fill to deepen shadows and sculpt the face. Or, if the scene calls for a softer look, a reflector or fill light can help reduce contrast.
Adding a backlight is another effective way to create separation. Just be sure to control spill so the backlight doesn’t flatten your contrast by lighting up the background unintentionally. I like to create a subtle rim around the subject’s hair and shoulders, with just a touch of light kissing the edge of the face.
Step 4: Finishing Touches (Optional)
This step depends on your background and creative intent. If your background already includes windows or practical lights, or if you’re going for a minimal look, you may not need to do much more. But if you want to add more texture or visual interest, there are a few techniques you can use.
You can motivate your key light by adding a practical light or simulating a window light source. A spotlight with a gobo can be used to create patterns like shutters or foliage on your background which makes your scene more immersive and textured. Adding areas of light and shadow with practicals or small lights aimed at surfaces or objects also makes your scene feel more dimensional.
Final Thoughts
This might not be a bare-bones setup, but with just a key light and a few smaller lights, I think it remains very manageable for a solo filmmaker. More importantly, following a clear system gives you the confidence to walk into any interview setup knowing you can get a polished, cinematic result. It also builds trust with clients. When they see you working with an intentional process, it reinforces their confidence in your vision and your ability to execute.